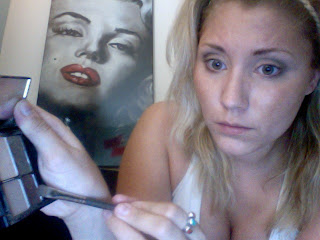
This is a simple look to achieve as long as you follow the steps and blend well you will achieve this beautiful smokey eye.
#1 Once you have your foundation and powder, blush/bronzer on then you can start on your eyes. (In this photo I already have foundation, powder and bronzer applied from earlier.)
#2 BROWS are what frames your eye area. This means you must keep them groomed and filled in to achieve the complete look. I am using a blonde colored Maybelline Expect Wear brow pencil. You can find these at any drug stores or anywhere you get makeup

#3 This has become my FAVORITE palette of colors for smokey eye look. Start with the lightest color on the palette. A neutral, tan base color will do.

#4 You want to apply this color all over your eyelid, up into the brow bone and in the inner and outer corners of your eyes. This will create a "clean" neutral look.
#5 This is what the base of your eyeshadow will look like. Very plain and single colored. A "clean", neutral look.
#6 Now you are going to start the shadowing of the color. In this particular palette I am choosing the third darkest color but you can use a medium brown color.

#7 Apply the darker color into the crease of your eye. This crease is below the brow bone. If you want a more dramatic look take the dark color a little over the brow bone to create more depth. The trick with the smokey eye look is the layering of your colors... So start light and just keep adding on layers.
#8 If you want a darker look just add a layer of darker color to your crease. I am adding some dark just for the picture sake so you can see the dimension and "smokey" look I created
#9 Next you are going to add a shimmer color which will create a highlighted look on the lighter areas of your eye. You want to apply this on the inner corner of both eyes and on the brow bone. DO NOT apply on the darker creased shadow.
#10 After you apply the shadow the best way to add "darker" and "depth" your eyes is with eye liner. I am just using a pencil liner BUT liquid liner works amazing as well... You want to create a "winged" look to help add in with the smokey dimension of the eye shadow that you already have going on.
#11 I find that it helps if you pull the skin tight in the area in which you are applying the eye liner to create a "winged" look.
#12 Now for your lashes. I ALWAYS curl my lashes to give them that VA-VA-VOOMM lift. Then apply mascara of your choice. My latest favorite mascara is: POWER VOLUME COLLAGEN by LOREAL. This is also when you would apply false lashes if you please to add extra length and drama to your look.
 #13 The Finished look :) Hope you enjoyed this DIY smokey eye demo. Let me know if you have any questions and at all and be sure to post any pictures of YOUR smokey eyes! Thank you!!!!!
THIS BRUSH WILL TRUTHFULLY BE YOUR BEST FRIEND WHEN IT COMES TO BLENDING THE PERFECT SMOKEY EYE. Make sure that it is a soft, long bristel brush that way it will lightly blend your colors together without removing a bulk amount of shadow that was already applied. :)


No comments:
Post a Comment